06 December 2011

Experimenting with larger models.


In my previous post I showed how I had covered my model in masking tape to give the model a cleaner finish that I would consider painting over if required. I found that the following day, due to the low tack of masking tape and the rounded surfaces of the figure, that the tape was peeling in certain places. This caused me to reconsider how I wanted to surface my models, my second idea being with PVA soaked kitchen towel, which I can then paint over. Another cause for rethinking my the way I wanted to make my models was finding polystyrene balls at the craft shop when buying supplies to experiment with making clothing for my models. I felt that they would be a good underpinning for the basic spherical structures contained within the figure. The sizes available caused me to rethink the scale of the figures I wanted to make. I decided that due to the size of the polystyrene balls I would make my figures substantially bigger, the advantage to this being that the eventual figure will be easier to detail and clothe due to its size. Once I have finished this model I will look for any issues that arise that may be cause for further experimentation, particularly with the method I am using to surface the model. If the kitchen towel proves to provide too rough a surface, then I shall experiment with newspaper soaked in wallpaper paste to see which provides better results.

30 November 2011

Newspaper Model


This week I've continued experimenting with using newspaper to build bulk around a wire armature as a method of modelmaking. I then covered the newspaper with masking tape to create an even surface which I may paint on.

The advantage I have found with this method is that the armature is still slightly posable underneath the newspaper, allowing for adjustments in the model's stance. This will allow for adding clothing to the model. The disadvantage to this method is the trial and error nature of how much newpaper to bind to the armature and where, however I think this will become easier to judge with practice.

So far I have found that creating models of figures at this scale has forced a compromise with the level of detail I can include. This has bought me to the conclusion that to provide lighting reference for the more detailed areas such as hands and faces I will make clay sculptures which I will light seperately, but in the same way as the figure used in the same composition. This will allow me to study more clearly the areas of light and shade, with the figure models acting as overall lighting reference for the figures.

The next step in my experimentation is to experiment with clothing my models, as the creases and folds of clothing provide another area where the detailed study of the effect of light will help to add realism to my compositions. To make my light studies easier I'll begin by making the clothing from basic white fabric to observe the tonal values, moving on to looking at the effect of coloured light sources on the colour of coloured clothing. 

16 November 2011

Material Experiments

As a starting point for my project, I've been experimenting with materials to make my faun models from. First I tried out terracotta air dry clay around a wire armature.

I made a basic armature using sculpting wire, bending it into shape with pliers and my hands. I used hot glue to affix it to a foam board base to give it some stability. I then built the clay around the armature. From this experiment I learnt not to use foam board as a base. The moisture from the clay soaked into the paper of the foam board, causing it to peel away. I will have to think on better materials to use to give my models stability. The air dry clay worked quite well, the finished model is very sturdy, but it is difficult to achieve any level of relief detail on a model of this size using this material.
I've also experimented with oven hardening clay, testing small amounts of Fimo and Sculpey for comparison. I tested the materials by making of my fauns' ears.  


Oven bake clay is not as easily molded as air dry clay, with a texture more like modelling clay than ceramic clay. You have to handle it for a few minutes for it to pliable enough to sculpt. I found that the Sculpey was easier to shape, but the Fimo held its shape better. So far I have only fired the Sculpey. As this is the first time I have tried oven hardening clay, I was unsure as to whether it had been fired for long enough, as it was still had some give to it when I took it out of the oven. It has hardened up after cooling, but I am usure if it is as hard as it should be.
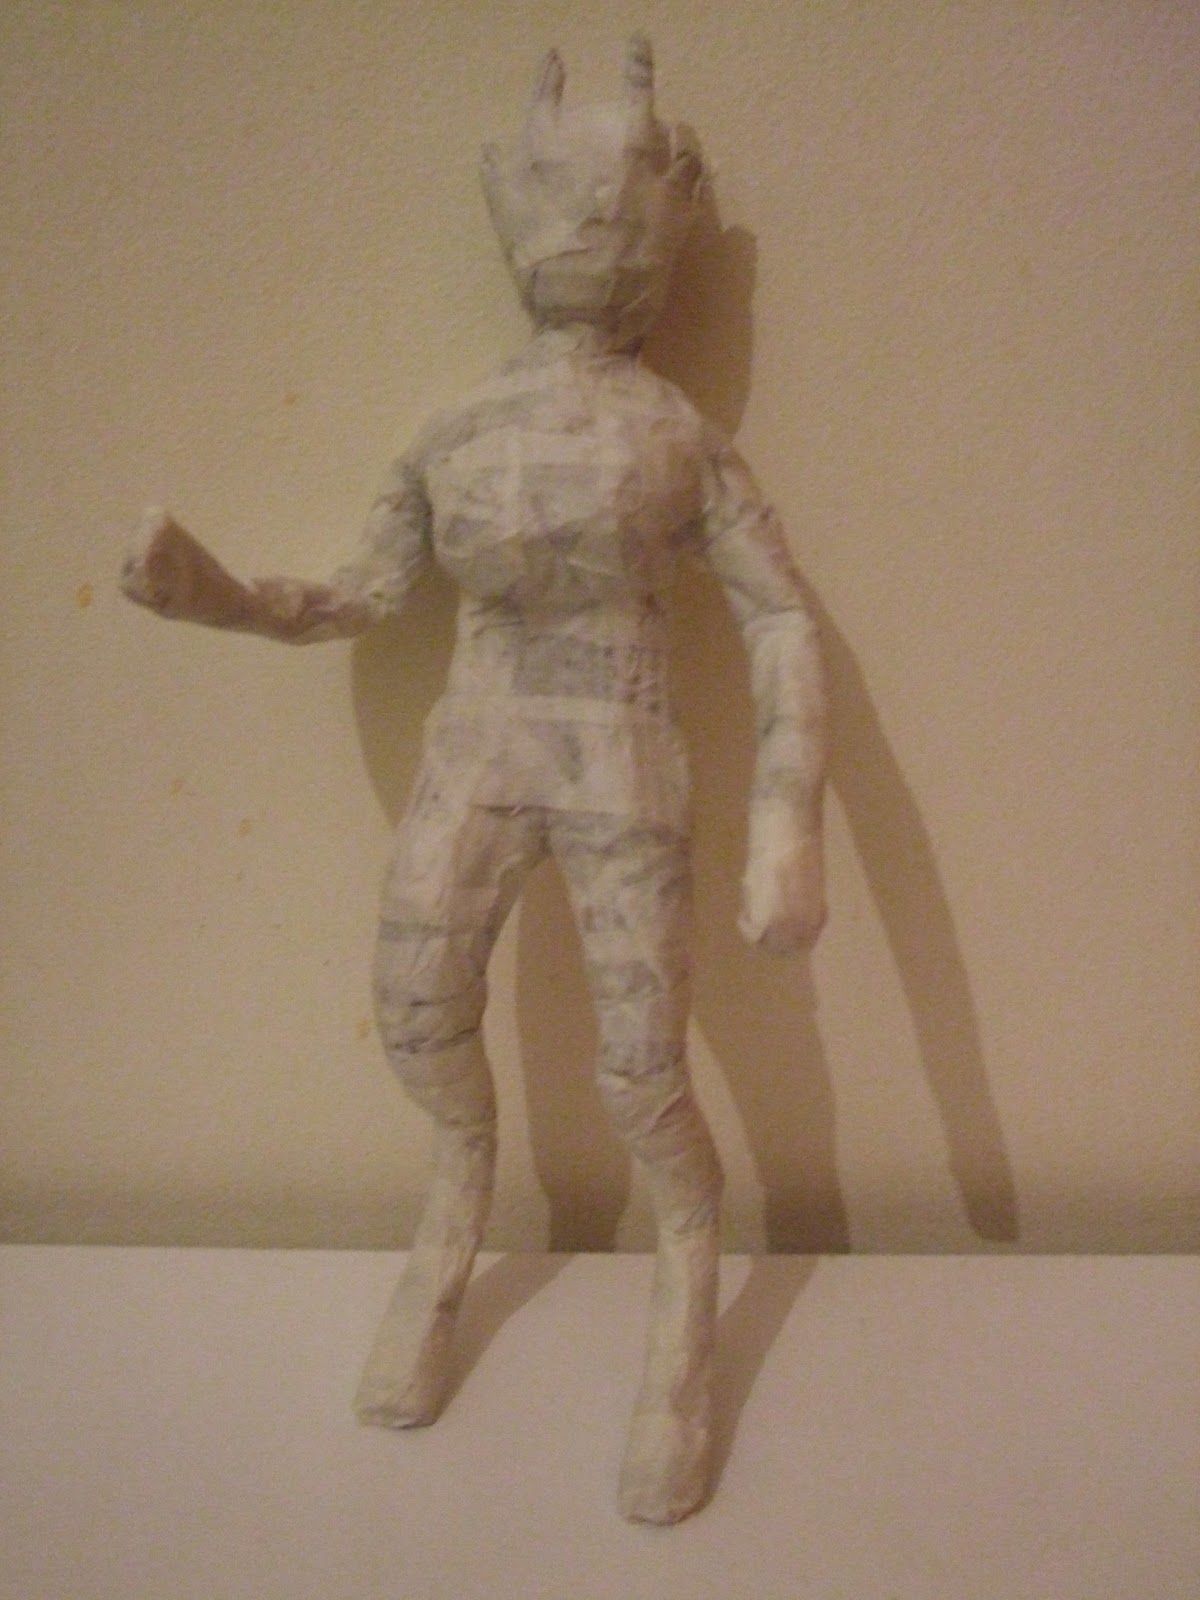
  The last experiment that I am working on at the moment is using newspaper around a wire armature to make a model. The armature was made in the same way as above, but I have bound newspaper to it with tape. I am unsure how I will progress with this, whether by covering it with a layer of masking tape or kitchen roll and PVA, as a base for paint. This is definitely the least refined outcome of my material experiments and I am unsure it will produce the results needed to make models for practical lighting due to the lack of sculpted form.

03 November 2011

Introduction

This blog will document my progression through my third year of my BA (Hons.) Illustration at the University of Gloucestershire. An outline and overview of my Final Major Project can be found here and a more detailed outline of my Research Project, which this blog will document, can be found here.